![New Foreign Trade Policy [FTP] 2023](https://afleo.com/wp-content/uploads/2023/03/Icegate-AD-Code-Registration-Process-Step-by-Step-Guide.jpg)
[ez-toc]
Overview:
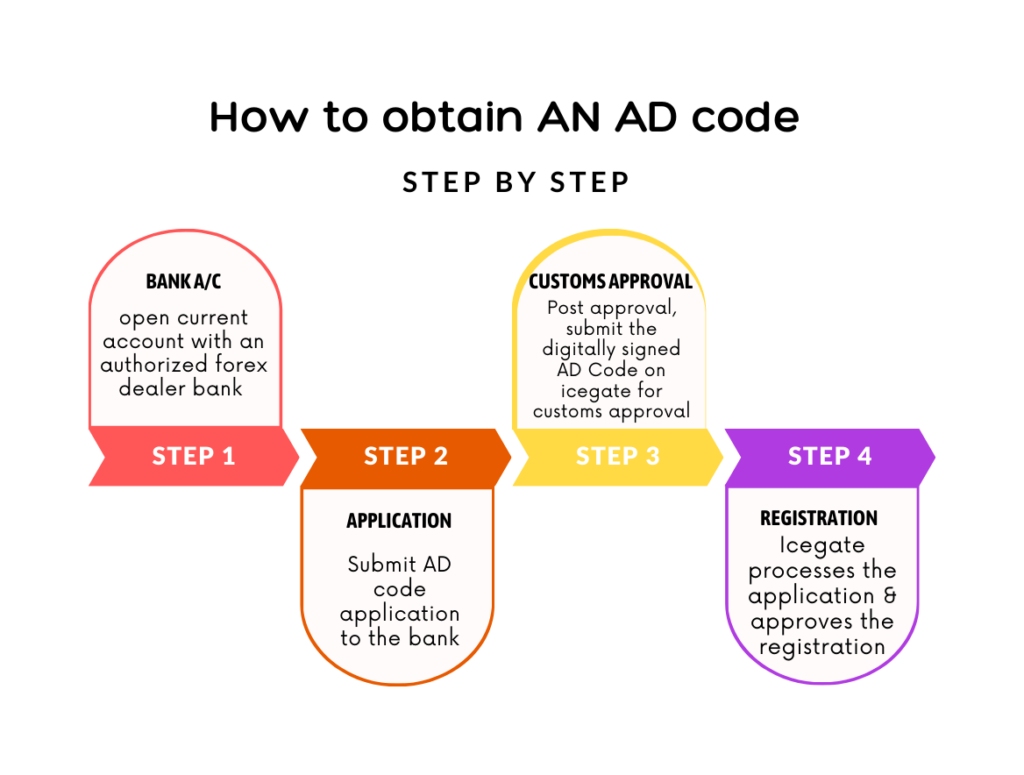
All exporters and importers of goods in India must obtain the AD code as it is required for customs clearance. Importers and exporters need to register an AD code at every port from where the goods are cleared by customs. The authorized bank assigns an AD code to any importer or exporter who opens a current account and wishes to conduct international business. An AD code is a 14-digit code issued by the bank with which the exporter has a business current account. This code, printed on bank letterhead, can be obtained after the exporter has registered with the Director General of Foreign Trade (DGFT) for an Import Export Code (IEC). It is valid for a lifetime. A shipping bill cannot be generated without an AD code registration. An AD code registration also provides benefits such as exemptions that are directly credited to the user’s current account.
Online Common Digital Platform for AD code registration
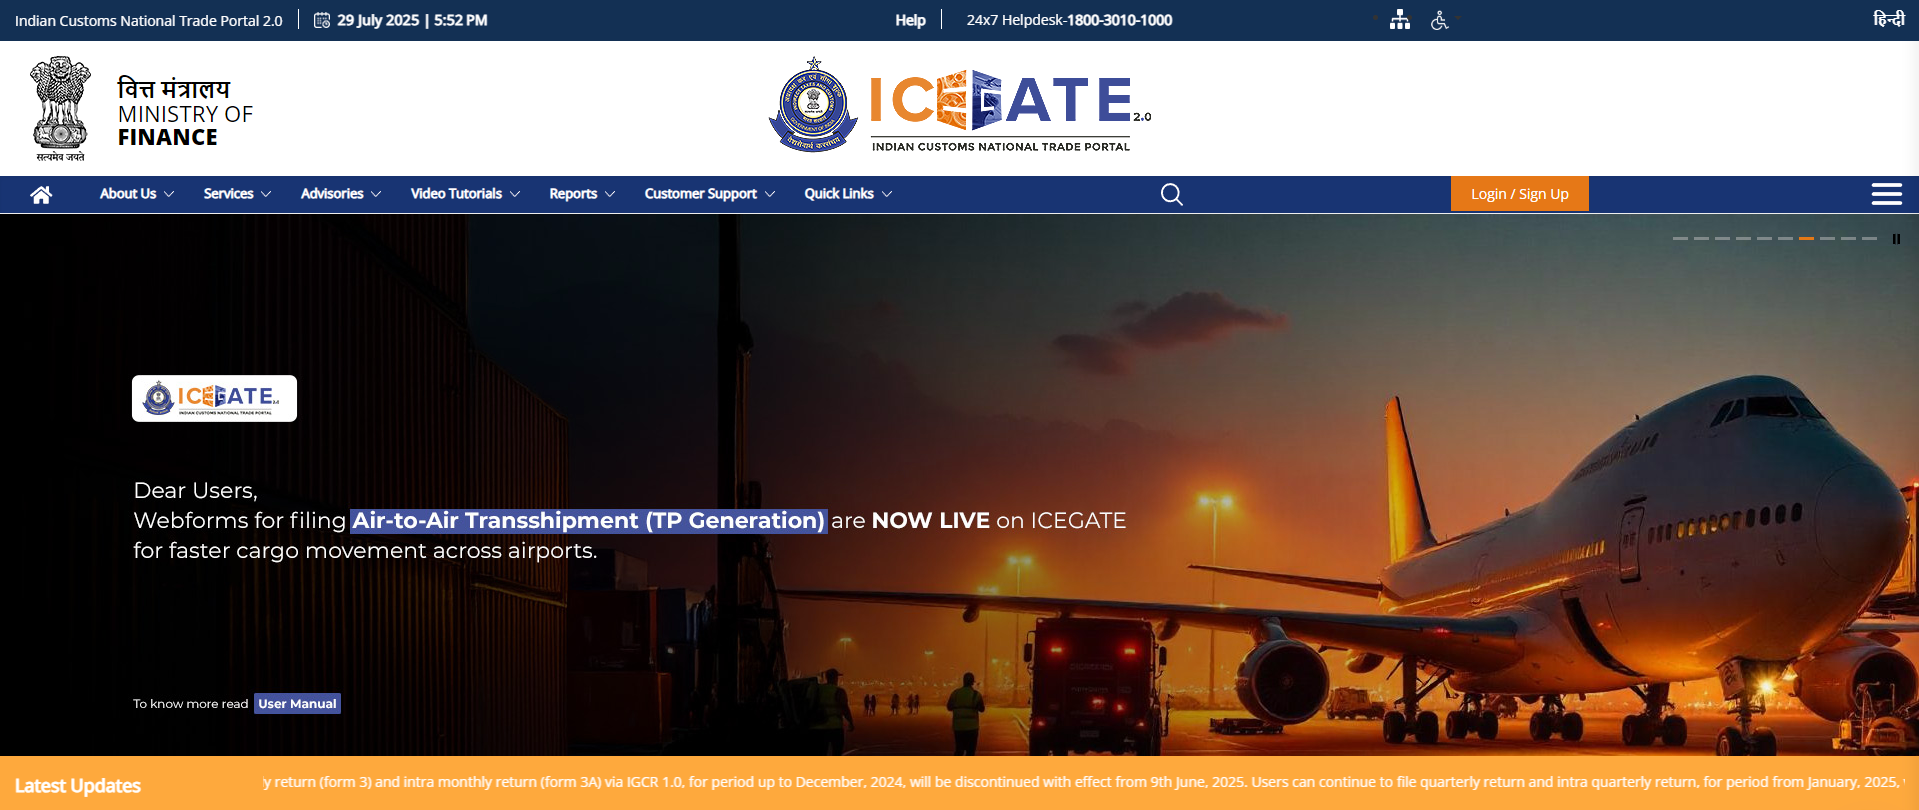
With increasing concerns about fraud and the need to improve the security of the international supply chain, the government has launched “Icegate,” a common platform (single window) to apply for AD code registration. The Indian Customs Electronic Gateway (ICEGATE) is the national portal of the Central Board of Indirect Taxes and Customs (CBIC). Through this online portal, the Customs department provides e-filing services to importers, exporters, cargo carriers, and other trading partners electronically. ICEGATE was implemented by the Customs Department to automate the process on January 3, 2022.
Watch this short video on Icegate AD code registration & IFSC Code Registration, which explains the importance, application procedure, and how we at AFLEO Group can assist you in registering the AD code/IFSC at the customs Icegate Portal.
How to Register AD Code in Icegate online? | Step by Step Guide
Planning to Export After Registering Your AD Code?
Don’t let freight slow you down. Our digital freight platform gives you real-time tracking, transparent pricing, and seamless customs support-all in one place.
Step 1: Documents Digital Sign
The first and most important step is to digitally sign the documents required for AD Code and IFSC Code registration. To begin, visit the official ICEGATE portal. On the homepage, locate and click on the ‘Services’ tab to access the digital signing feature.

Step 2: Select ‘Sign using DSC’
Under the ‘Services’ section, choose the ‘Sign using DSC’ option. This will open a new window where you can initiate the digital signature process. Make sure your Digital Signature Certificate (DSC) token is connected and properly installed on your system.

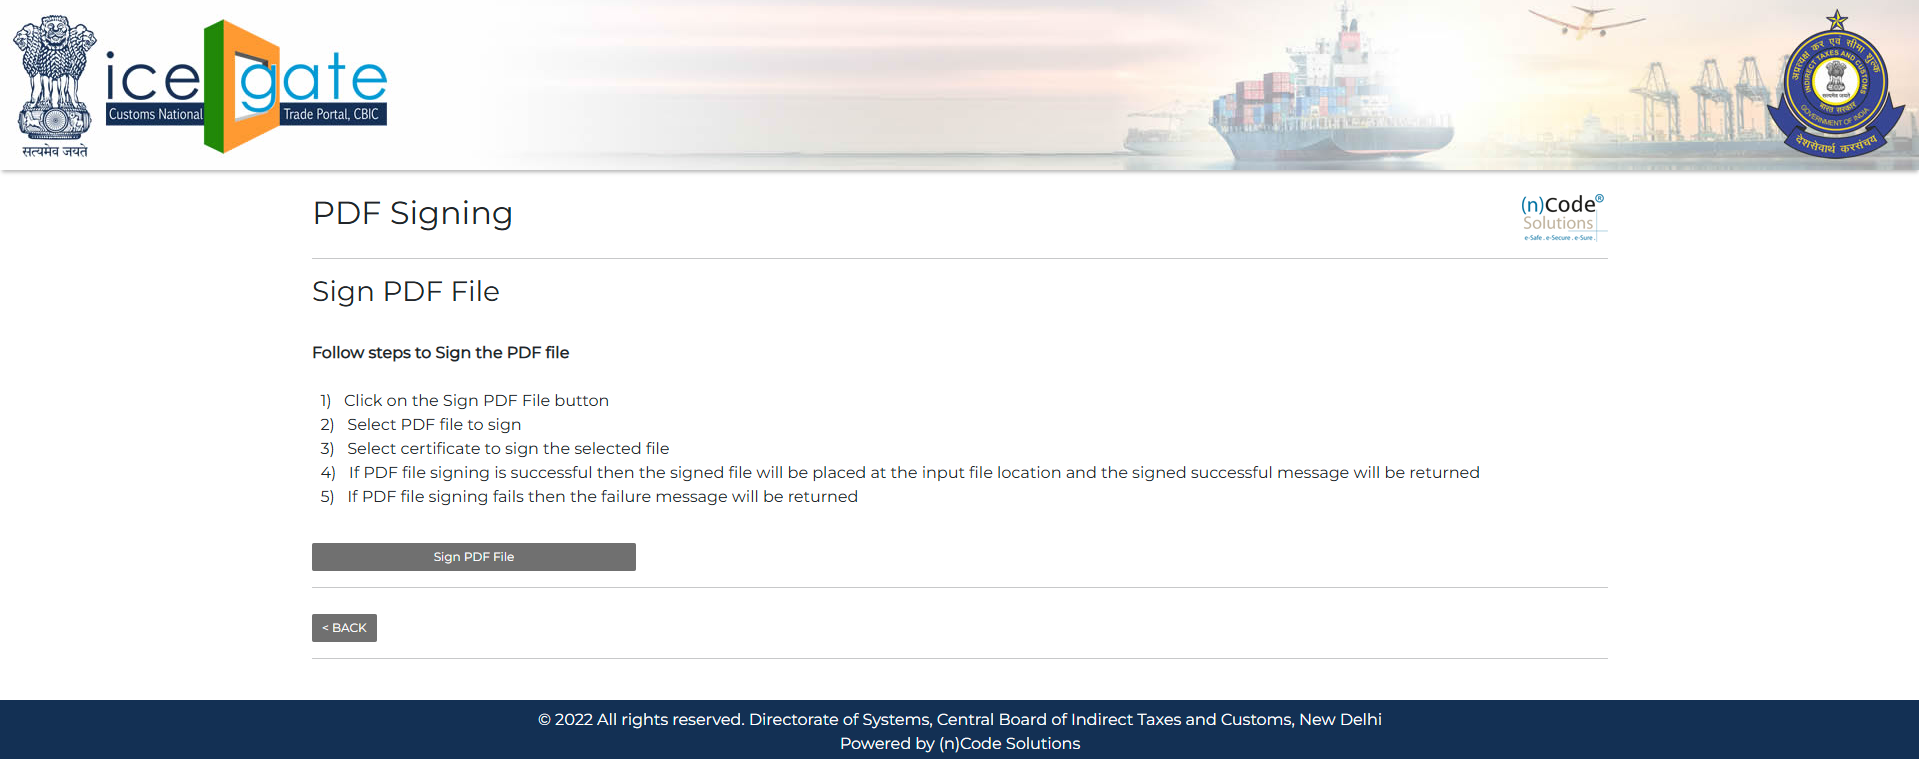
Step 3 : Sign the PDF Documents
In the newly opened window, you’ll find an option to select and digitally sign PDF files. Choose the required files related to your AD Code application and complete the digital signing process using your DSC.
Step 4 : Upload Signed Documents
Once your documents are digitally signed, proceed to upload them through the same window. These signed PDFs will be used in the next steps of registration, so ensure the uploads are successful and clearly visible.
Step 5: ICEGATE Login with User ID & Password
After completing the digital signing, return to the ICEGATE homepage and log in using your registered User ID and Password. This login allows access to your profile and facilitates further steps in the registration process.
Step 6: Access Profile Status
Once logged in, go to the ‘Profile Status’ section under your dashboard. This area allows you to view and update your registration details, including access to the ‘Bank Account’ section where the AD Code must be added.

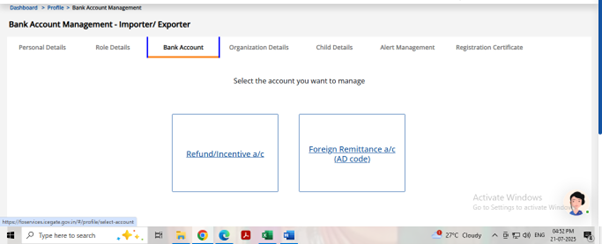
Step 7: Go to Bank Accounts Section
In the ‘Profile Status’ tab, click on ‘Bank Account’ to manage or update your linked banking details. You will find a list of your bank accounts, and this is where you will initiate AD Code mapping.
Step 8: Submission of application
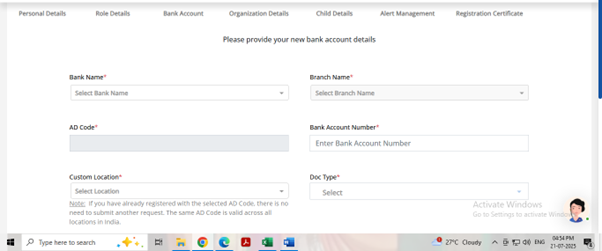
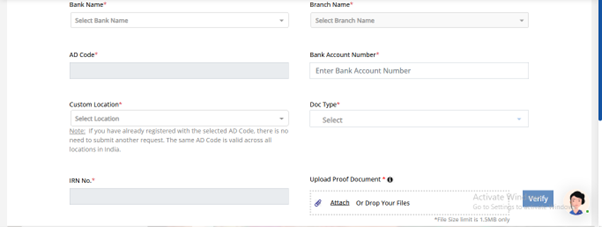
To add your AD Code, select the appropriate bank name and branch from the drop-down menu. The AD Code will auto-populate. Then, enter your account number and location, and upload the digitally signed documents to complete the submission.
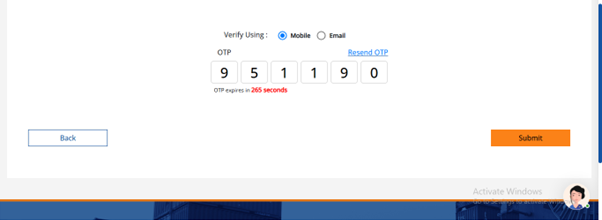
Please clarify whether the OTP is sent via email or mobile after the bank details are added, and if the preferred method is specified during the process.
Status at Custom can be of following types:
- System Pending – Request is pending for verification at the system level.
- System Rejected – Request has an error at the system level
- Custom port Approved – Request has no error and Custom port has approved the request. The bank account will be reflected on the dashboard once the request is Custom port approved.
- Custom port Rejected – Request has been rejected by Custom port officers
- Custom port Pending – Request has no system-level error and a request is pending with the Custom port officer.
If the request is rejected, the user can view the request status with an error code. Accordingly, the user can modify the request and submit it again as described.
How can we help you
We at AFLEO Group are a team of DGFT and customs experts with a rich experience of over 10 years in export consultancy and international logistics [freight forwarding]. With our vast knowledge and experience in this field, we can help you with the registration of AD codes and IFSCs at all ports in India in a fast and efficient manner.
So do get in touch with us for any of your requirements, and our team will be happy to help you.
Let us know if you have any doubts in the below section.